
The Model Maker
Jayesh Srinivasa Ellayah
Computer Application
Project 1
Below is my project progression work. Please click from left to right to view how the structure was build up using Rhinoceros Software. Description on each photo are written.
Project 2a Exterior Rendering
Below is my project progression work. Please click from left to right to view how my building was transferred from rhinoceros to 3ds max for rendering purposes. Landscape creation is included. Furthermore the two last photos consists an Eye level view and Bird Eye view that was rendered using photoshop. Description on each photos are shown while directing your cursor on it.
Project 2b Interior Rendering
Below is my project progression work. Please click from left to right to view how my the interior of my building was designed. Last 2 photos consists of 2 EYE LEVEL View that was rendered and modified using photoshop for further rendering.Description on each photos are shown while directing your cursor on it.
Project 3 Video Rendering
Below is my project progression work. Please click from left to right to view how video animations was made. Frames were rendered and modified using movavi video suite.Description on each photos are shown while directing your cursor on it. Below is the video animation itself.
Effects in animations follows by: typewriter soundtrack->Eye view->interior->showing guns as house for world war veteran->light off and on in room->showing helicopter moving wings and sound effect-> sun movement and shadows-> time bomb sound effect-> bomb effect on house.
Video Annimation
Video Annimation Progression
 1. Making my ground floor plan on autocad.png |  2. Importing the cad file to Rhino for massing.png |  3. File successfully imported.png |
|---|---|---|
 4. Making a plane for the 3d house.png |  5. Use of polyline and converting to planar curves for extrusion.png |  6. Successfully extruding all the wall with the use of extrude surface tool.png |
 7. Splitting the walls for windows and doors frame.png | 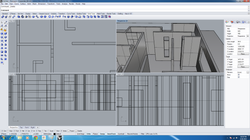 8. Inside window frame done.png |  9. Front window frames completed.png |
 10. Back window frames completed.png |  11. Designing a stair like form to split from wall.png |  12. Successfully splitting the wall according to the design.png |
 13. Covering the stair like design to be have a rood for the entrance.png |  14. Spliting the inside wall for a user to enter the house from the entrance.png |  15. Designing the roof slab and converted to planar curves.png |
 16. Roof slab extruded and being placed on the model.png |  17. All roof slab placed and model completed.png |  18. View from back left side.png |
 19. View from back right side.png | 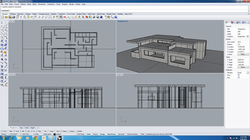 20. Front view of the model.png |  21. Desiging window frames.png |
 22. Rotating window frame using 3d rotate tool.png |  23. Window frame successfully rotated to correct side.png |  24. Placing indoor window frames.png |
 25. Views to show all window frames placed successfully and structing massing co |
 Eye level view.jpg |  Bird eye view.jpg |  1. Starting from project 1.jpg |
|---|---|---|
 2. adding a pond.jpg |  3. adding window panels.jpg |  4. creating lines for topography.jpg |
 5. Completing landscape topography.jpg |  6. importing file to 3ds max and starting to add materials.jpg |  7. adding grass.jpg |
 8. using uvw map to resize the grass to actual size.jpg |  9. Selecting specific surface to add certain material using polygon selector.jpg |  10. rendering.jpg |
 11. adding daylight and sun direction.jpg |  11a. adding 3d trees.jpg |  12. camera set to eye level and i choose this view.jpg |
 13. open in photoshop.jpg |  14. delete background sky with the help of alpha channel.jpg |  15. download and add a new sky.jpg |
 16. adjust it to the right ratio.jpg |  17. add trees and shadows.jpg |  18. adding human figure and his shadow.jpg |
 19. Completing the eye level photo rendering with all figues ratioed according t |  20. completing bird level view.jpg | Bird eye view.jpg |
Eye level view.jpg |
 Bed room |  Living Room |  1. Adding Object and Furniture after creating them.jpg |
|---|---|---|
 2. Use Of Scaling to adjust the size of objects and Furnitures.jpg |  3. Adding Free light from tool bar and adjusting the intensity and form to fit o |  4. Using Edit Mess to Select specific part of vase to edit.jpg |
 5.Use Of UVM Map to select mapping as cylindrical and adjust real size by changi |  6. Use Of UVM Map to adjust correct Length And Height Of Material To A Realistic |  7. Furniture And Interior Views.jpg |
 8 .Furniture And Interior Views1.jpg |  9 .Furniture And Interior Views2.jpg |  10. Furniture And Interior Views3.jpg |
 11 .Furniture And Interior Views4.jpg | 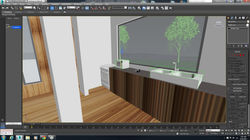 12. Furniture And Interior Views5.jpg |  13. Furniture And Interior Views6.jpg |
 14. Furniture And Interior Views7.jpg |  15. Furniture And Interior Views8.jpg |  16. Furniture And Interior Views9.jpg |
 17. Photoshop Edit + People shadow | Bed room | Living Room |
 1. Adding helicopter.png |  2. war tanks and war vehicles.png |  2a. adding guns since owner is a world war veteran.png |
|---|---|---|
 3. placing camera.png |  4. camera movement.png |  5. Camera different framerates.png |
 6. adding sun movement.png |  7. moving helicopter wings movement.png | 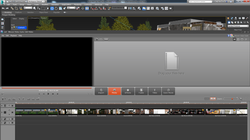 8. compiling every videos rendered.png |
 9. adding effection and anotations to video.png |  10.adding different sound tracks to video.png |  11. adjusting sound track according to each video effects.png |